
I personally don’t understand why anyone would use a photo editing program to design a website, but I also recognize we’re in the minority here. So here are some reasons why we use Illustrator when we’re designing websites, along with some tips and assets to help you do the same.
As a designer, working with vector graphics over raster images gives you several distinct advantages. Specifically, you can move and swap groups of elements with ease, including adjusting their size, shape, colour, and layout almost instantaneously, without regard for diminishing resolution or sharpness issues when scaling, or colour issues when trying to replace colour or fill raster images.
These benefits are particularly useful for the web designer who may be working with changing page structures and user interface elements, such as button sizes, shapes, and colours, or shifting menus and submenus, including size, location and colour adjustments.
As an added benefit, you can print out high quality preview images for review or for your portfolio.
With all this in mind, here are some tips and assets to get you started using Illustrator as a web design tool.
For starters, you need to understand a pixel issue that can be solved with some careful planning. It’s easy to starting placing elements off pixel in Illustrator which has the unfortunate result of making edges fuzzy. Website images are pixel specific, so if you have a 1 pixel line that is half on one pixel and have on another in Illustrator, it will end up being lighter or have fuzzy edges when you create your web image. To combat this there are two helpful Illustrator techniques, and the rest is up to you.
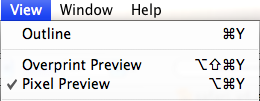
Step 1: Turn on Pixel Preview.
Pixel Preview will help you spot soft edges that are the result of off pixel elements. You’ll find pixel preview under your view menu, as follows:
Here’s the difference between an image with Pixel Preview turned on, and one without Pixel Preview.
Without Pixel Preview:
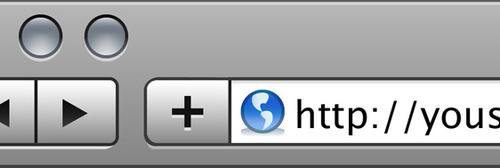
This highly zoomed in browser template looks perfectly smooth without Pixel Preview turned on, but that’s deceptive when it’s a screen resolution website you’re designing.
With Pixel Preview:
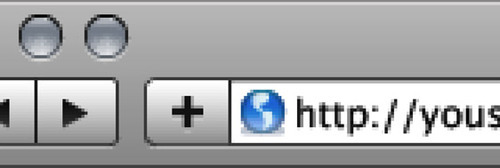
With Pixel Preview turned on, zooming in shows you the actual pixels which make up your on screen image. This really helps spot off pixel lines which will appear blurry instead of crisp. Here’s the exact same image, with elements sitting at .5 vertical and .5 horizontal coordinates instead of precisely on pixel.
You can see here that both horizontal and vertical single pixel crisp lines now appear disjointed or faded across two pixels. That’s because they are. This means when you save these images for web, your clean lines become muddy pasty things that make your website look less than stellar.
So, what else can you do in Illustrator to prevent off pixel elements.
Step 2: Get friendly with Illustrator’s Transform window.
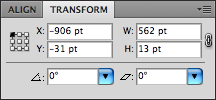
First and foremost, as shown below, ensure that the little black square on the grid of 9 squares in the Transform window is in the top left and not in the centre. Now that you’ve done this, you can easily see, when drawing lines or placing shapes, when an element is not precisely on pixel.
Specifically, instead of the whole numbers shown above, you’ll see decimal points. You don’t want decimal points, particularly on your x and y axis, though rounded elements and text will often not be perfect. As much as possible, it’s ideal to clean this stuff up. Here’s an example of what you don’t want to see:
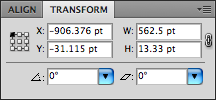
If you are seeing this, the solution is to simply delete everything following the decimal points. If you do this, Illustrator will shift the element onto pixel.
So that’s really all you need to know to make sure that your Illustrator elements are crisp and clear when you’re designing for the web. Enjoy!